Great events need great registration
Registration: a critical moment to make a good first impression with customers and convert them to attendees. With Swoogo you can:
- Build bespoke registration paths with unlimited customizations
- Capture key data, share it in reports, pass it to other platforms
- Make your event registration fun, on-brand, and visually stunning
- Easily clone and repeat once you’ve built your dream reg flow

No one does registration better than Swoogo
When events are central to your business plan, you need a registration experience that fits into your business plan, not the other way around.
Registration that people will actually love
Collect the right data from the get-go
Events never stop: clone your successes
Build a customized registration experience the easy way

Bring in your branding
Write your own questions in company voice and bring in colors, logos, and themes. Use your registration form as a launch pad for your entire event experience.Customize your registration pathways
Build registration flows that adapt to every attendee. With unlimited conditional logic and smart automations, you can show the right fields (or entire pages) to different registrants, hide what’s irrelevant, and auto-enroll guests in the sessions that fit. Fewer drop-offs, way smoother.Flexible registration
Not ready to open reg? Not enough space? Allow early birds to put themselves on an invite list, or automatically move people to a waitlist until space opens up.Set your reg data free
Your registration data doesn't need to just live in Swoogo. Easily connect your tech stack and choose what data to send. Update campaigns, attendance, contact records, and more.
Collect payments easily, with fewer fees
Set custom pricing and based on attendee attributes, allow attendees to choose payment methods and plans, and customize fees any which way. Swoogo makes paid events easy. Best of all? We don’t take an extra fee from every transaction – that’s between you and your payment gateway!
Registration time? Make your brand shine
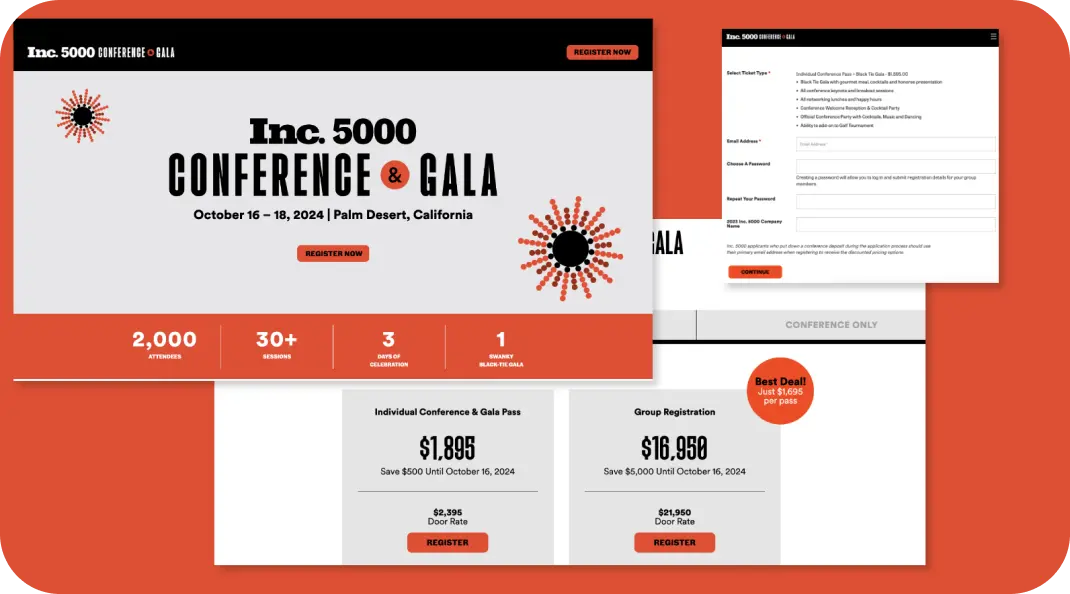
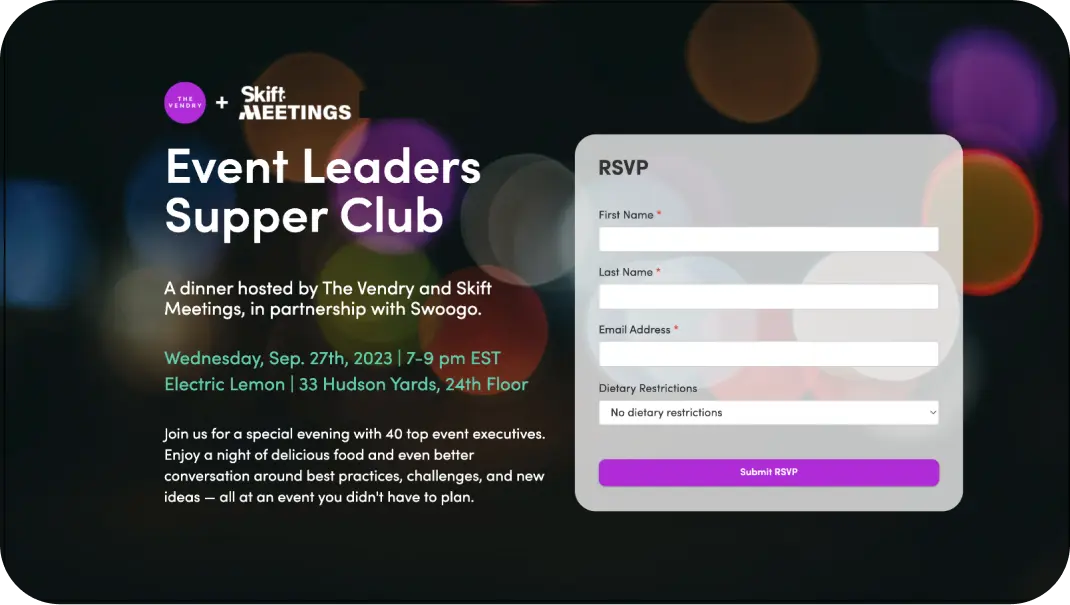
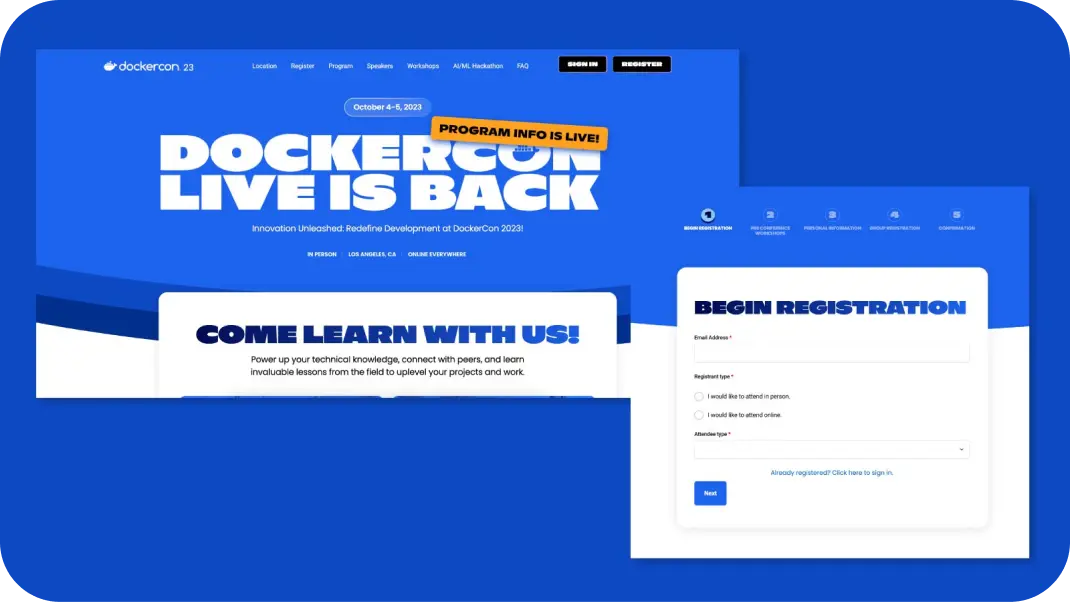
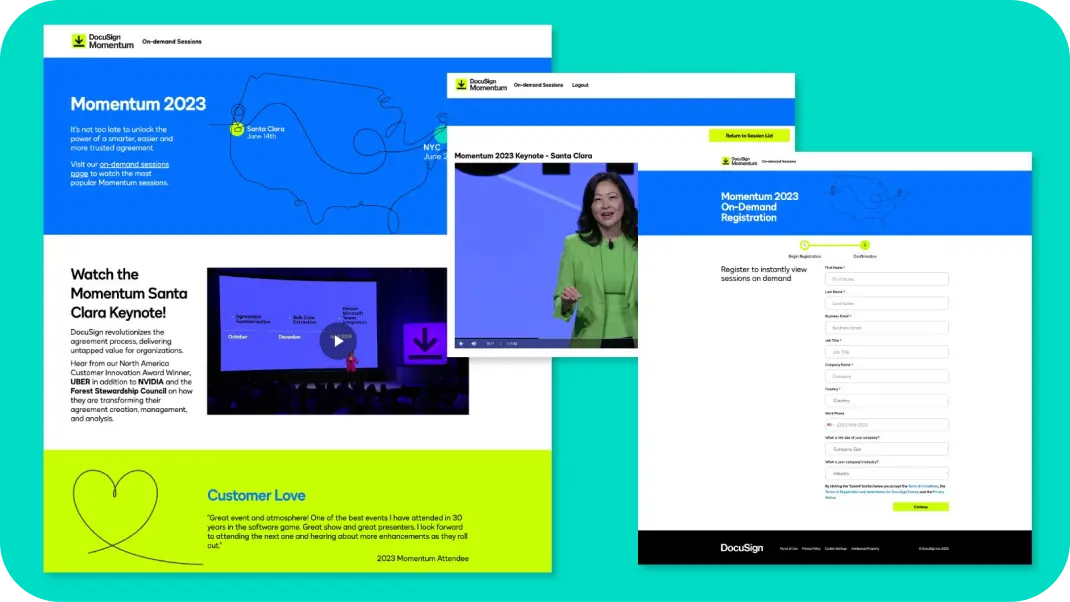
Some incredible organizations and brands are building amazing registration experiences on Swoogo!


Start your data journey right, with the first touchpoint: registration

Ask the questions YOU need
The data you capture during registration will determine how you personalize the entire experience for this event, and help you strategize for the next one.Custom fields = great data
Add your own data fields to capture the important details about registrants. Show or hide fields based on registrant answers; use hidden fields to collect referral or UTM data. Swoogo lets you get your data in top shape for event logistics and revenue analysis.Privacy and data protection
Let attendees know their personal and financial info is safe. Swoogo offers contact and field scrubbing for GDPR compliance, plus visible security and compliance notices, and maintains multiple security certifications.
You can have any registration report your heart desires
Whether you’re delivering data to sales, demand generation, your CMO, or anyone else, Swoogo lets you build and share whatever reports you need— from registration responses to event stats to individual attendees’ in-event activity.
Great events create unstoppable momentum

User-based pricing=more events
Event-driven growth is helping companies scale across the globe. Our pricing means you can hold more events, for more registrants, for the same price, to ROI faster.Easy cloning: rinse and repeat
Cloning a past event makes repeating and scaling up your event strategy easier than ever. Keep large volumes of events on-brand with themes and shared custom fields.Powerful integrations
Whatever tech is essential for your event, we’ll help you hook it up to Swoogo, no extra fees. Feed your registrant data to Salesforce, HubSpot, Marketo, and more.More than a technology vendor, we’re your partner
Every customer receives a personal account manager, as well as full access to our legendary, in-house support team, so you can build fearlessly!


